HP 934, 935 Cartridge Missing or Damaged Errors
 TECH FLASH:
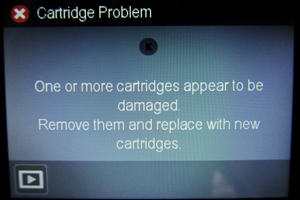
For refilled HP 934/935 ink cartridge series printer models which display printer/cartridge error messages such as “cartridge missing or damaged”, “cartridge problem“, “cartridge depleted“, etc., and printing is not permitted, there is a new printer firmware update available for HP OJ Pro 62xx & 68xx printer models which will enable refilled ink cartridges to function normally (as of Sept. 2017). Click on the link below; this will explain the issue & offer a printer firmware download to fix the issue and allow you to continue using refilled ink cartridges: click here
Why did HP do this?
See ACTIONABLE INTELLIGENCE Report, Sept. 15 2017 — Is HP up to Its Same Old Firmware Tricks?
See ACTIONABLE INTELLIGENCE Report, Oct 13, 2017 — HP Shares Insight into What It Is—and Isn’t—Doing with Dynamic Security in Its Inkjet Printer Firmware
What printers are impacted by this firmware upgrade?
HP Officejet Pro 6230 ePrinter, HP Officejet Pro 6830 e-All-in-One Printer, HP Officejet Pro 6835 e-All-in-One Printer, HP Officejet 6812 e-All-in-One Printer, HP Officejet 6815 e-All-in-One Printer
What kind of error messages are customers seeing when impacted by this firmware issue?
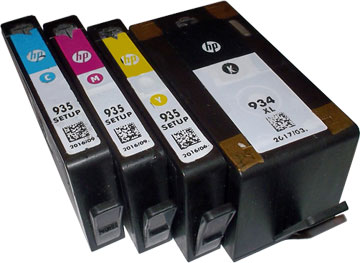
If the customer has accepted the firmware upgrade and are using older versions of the smart chip (i.e. Revision A) that are not compatible with the new firmware, they will see lockout error messages such as “Cartridge Problem”, “One or more cartridges are missing or damaged” or “Older generation cartridge” which prevents HP 934, 934XL, 935, 935XL refilled cartridge usage.
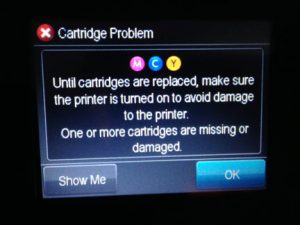
NOTE: Error can jump from color to color; all refilled cartridges may be suspect.
NORMAL Cartridge Alerts
1) Upon installation of a refilled HP 934, 934XL, 935 & 935XL ink cartridge you will observe various ‘Used’, ‘Counterfeit’ & ‘Non-HP’ alert messages. Choose ‘Yes’, ‘Continue’ and/or ‘OK’ to bypass the various nuisance alerts. This will enable normal print operations.
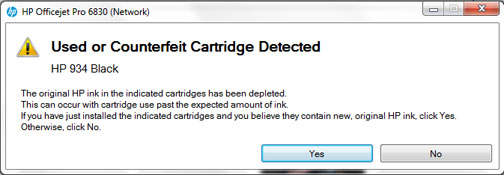
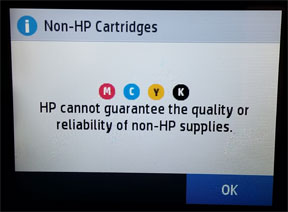
NOTE: “Used“, “Counterfeit”, “Refilled” and “Non-Genuine Cartridge” alerts are COMPLETELY NORMAL for all HP 934, 934XL, 935 & 935XL black and color ink cartridges which have been refilled and are initially installed into the printer. These nuisance messages may be bypassed and normal printing will be available. Since new replacement chips were installed, ink level monitoring will be available.
2) Since the HP 934, 934XL, 935 & 935XL cartridges have new replacement chips installed, ink level monitoring will be available. NOTE: Upon refilled cartridge installation the printer may show a “Low Ink” alert message one time, simply select ‘OK’ to proceed.
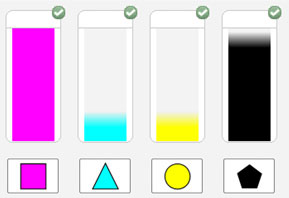
3) During normal printing you will observe two levels of ink low warning messages – this is normal.
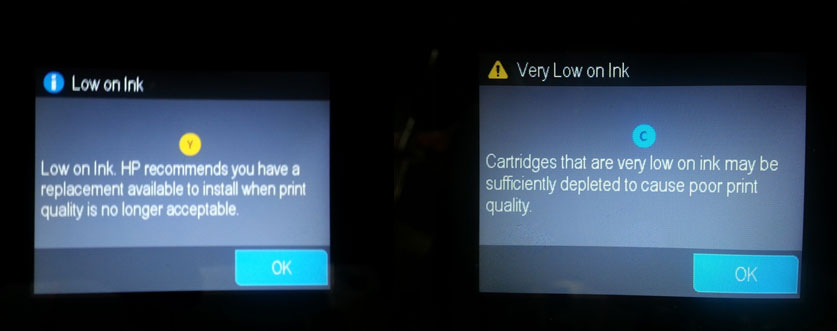
ABNORMAL Cartridge Alerts
If the printer cannot recognize the ink cartridge (i.e. “Cartridge Error”, “Missing or Damaged”, “Unrecognized Cartridge”, etc.), then first re-seat the ink cartridge(s) in the carriage.
Next, check the printer firmware version to ensure you have the latest version loaded (1739A). Click on the following link. Simply input your HP OfficeJet printer model (‘HP OfficeJet Pro 6830’), select the Firmware dropdown tab, and click Download to begin the firmware download. Refer to complete printer upgrade steps down below.
Click Here to Obtain Printer Driver/Firmware Updates from HP

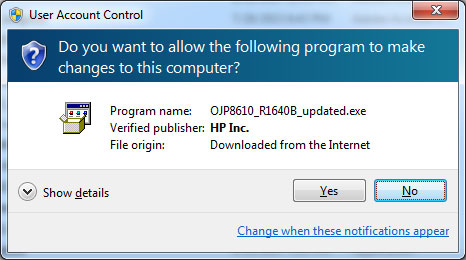
After the .exe or .dmg file is downloaded, double-click on the .exe file (Windows systems) to execute the printer firmware upgrade (click ‘Yes’, ‘Update’, and follow the instructions). For MAC’s, simply drag the .dmg file to the applications folder to launch the firmware updater. Once the printer upgrade is complete (takes ~4 minutes), this should allow you to continue using refilled ink cartridges.
If an ink cartridge error continues to be displayed then remove the suspect cartridge and carefully inspect the smart chip on the bottom – refer to video.
———-
ADDITIONAL TROUBLESHOOTING
If the HP 934, 934XL, 935, 935XL cartridge error condition persists (i.e. ‘missing or damage’ errors, etc.) following a firmware check/update, then the error may be caused by cartridge to printer connectivity. It is suggested to perform the following checks;
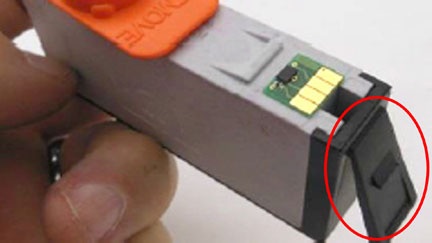
1) Ensure cartridge is fully locking into position and cartridge’s plastic tabs are properly aligned. Be careful not to bend the tab out more than 1.27 cm (0.5 inches). Moving the tab too far might damage the cartridge or cause the tab to break off.

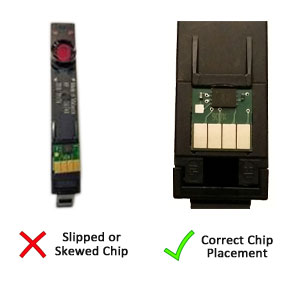
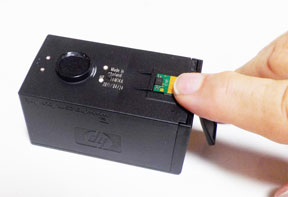
2) The issue may be caused by a slipped or skewed chip issue. Remove the refilled cartridges and inspect cartridge’s smart chip for proper placement and alignment. Return cartridge to refill lab if this condition is present.
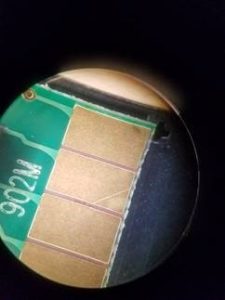
3) The issue could be caused by a scratched chip (see photo below of a scratched chip which resulted in a cartridge error condition). Ensure no DEEP scratches are visible on chip surfaces. Return cartridge to refill lab if this condition is present.
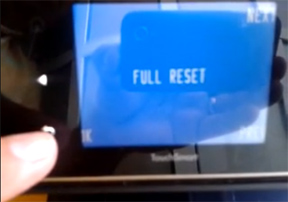
4) Reset the Printer:
From the printer’s main menu, select (Note: printer buttons will NOT be illuminated):
a. BACK
b. CANCEL
c. BACK
d. CANCEL
Inside the Service Menu, locate the Resets Menu, select Semi-Full Reset to reset the printer.
5) Install brand new HP original 934/935 cartridges to completely rule out the refilled cartridge/chip detection issue.
6) If a detection issue continues, return to ink refill lab and request to have the cartridge/chip evaluated.
———–
Resolution Steps:
If you have recently updated your printer’s software/firmware and continue to experience a cartridge lock-out, we recommend you return your cartridges to the retailer for smart chip evaluation. You will need to bring in ALL refilled cartridges to ensure each has a compatible chip version installed.

How to Disable HP Auto Updates:
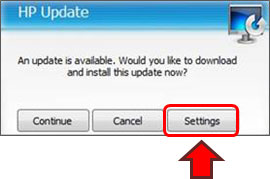
To help prevent future cartridge lock-outs it is suggested to disable HP Updates as they appear (i.e. 1 or 2-week time based message).
Step 1. When the HP Update prompt is displayed, select Settings.
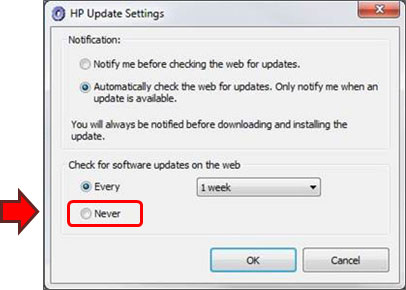
Step 2. Select ‘Never’ under Notification software update frequency.
Step 3. If your computer continues to display the HP Update prompt, select Cancel.
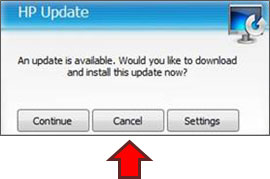
NOTE 1: The HP 934/935 ink-series printers use a display panel and require that the Web Services function be enabled for automatic updates to work (this is turned on by default with new printer installations!). To change the automatic update settings you will need to follow the below prompts:
- Open Web Services (open internet web browser and type in the printer’s IP address, i.e. 192.168.x.xx for example)
- Open the Settings screen
- Select Printer Update
- Select Auto Update
Select the On or Off option (Off to Disable)
NOTE 2: With respect to disabling HP Auto Update printer firmware on Win 10 platforms, unfortunately there is no such button or feature for Win10 operating systems. Microsoft systems removed the options that were there in the prior OS versions to select and deny individual updates. They are now automatically imposed on all who use Win10 Home platforms.
You can follow the instructions in the following link to disable Updates, but not to select individual ones: How to Uninstall and Block Updates and Drivers on Windows 10 (via HOWTOGEEK): https://www.howtogeek.com/223864/how-to-uninstall-and-block-updates-and-drivers-on-windows-10/
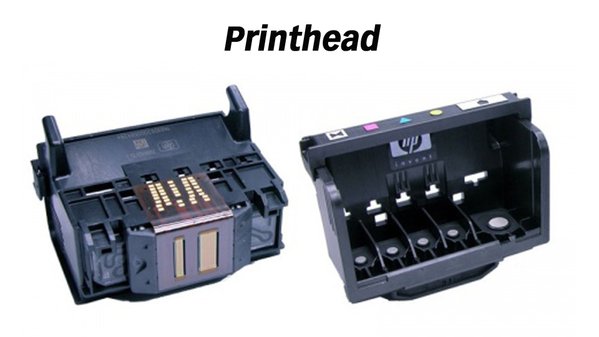 TECHNICAL NOTE: The built-in PRINTHEAD will eventually fail over time with usage and age (may or may not be replaceable depending on printer model – refer to User Manual).
To learn more about Printhead Function & Failure conditions, please select your printer model:
HP OfficeJet Pro 6230 Printer, HP OfficeJet Pro 6830 Printer, HP OfficeJet Pro 6835 Printer, HP OfficeJet 6812 eAIO Printer, HP OfficeJet 6815 eAIO Printer, HP OfficeJet 6820 e-All-in-One Printer, HP OfficeJet 6810 e-All-in-One Printer
For any additional questions or issues please contact us.


