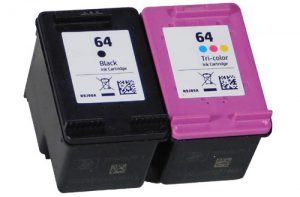
Clogged Ink Nozzles – HP 64 Cartridge Recovery
Cartridge Cleaning Procedure for Clogged Ink Cartridge Nozzles
If nozzles are allowed to dry or clog, white streaks may be visible in the printed text or graphic. Printing alone may not remove clogs from the nozzles, sometimes a ‘cartridge clean’ may need to be initiated from printer’s control menu or printer software. For a severely clogged ink cartridge (i.e. completely missing color(s) and/or partial jetting of color(s), which cannot be revived by the methods listed above, you can attempt a manual ink cartridge recovery to loosen dried ink and/or built up ink residue.

TIP: To improve print quality for an integrated ink cartridge, you may need to manually clean the nozzle plate and/or rear electrical contacts. Using an isopropyl alcohol dampened lint-free moist cloth, gently blot the nozzle plate until some ink is drawn out and absorbed into the cloth. Ensure rear electrical (gold) contacts are thoroughly clean of all ink residue and lint fibers. Ensure cartridge is dry before re-installing into printer.

Most printers include some form of a test page under the tools or maintenance menu. You may also select an Inkjet411 test print by choosing the ‘Test Prints’ selection below:

HP Diagnostic Test Print (several colors are misfiring)
NOTE: If the printer/cartridge is rarely used, or old, there is the possibility the internal foam has hardened (dried) to a point where the ink will not absorb properly into the foam and flow down to the nozzle plate (often cartridges may experience severe ink pooling or leaking at the bottom when this occurs). If this is the case then the cartridge will need to be replaced.
Using a cotton swab dipped in isopropyl alcohol thoroughly clean the flexible cable contacts inside the printer. Ensure contacts are thoroughly clean of all ink residue and no lint fibers remain on cable surfaces. Ensure flex cable contacts are fully dry before re-installing cartridges back into printer.

Service Station Caps/Seals (or wipers) – Cleaning Procedure
HP Service Station Cleaning (pdf)
If printed output appears to be smeared with multiple colors* then the service station or parking pad is likely dirty (i.e. full of residual ink buildup) and will need to be cleaned. In the example below the yellow ink is contaminated with magenta ink (“cross contamination”).

Steps:
- Remove ink cartridges from the carriage.
- Dampen a lint free cotton swab with distilled water. Gently clean both service station caps (cartridge parking pads) until thoroughly clean of ink residue / debris build-up.
- Inspect to ensure no fibers remain on station caps, if present.

* Storing ink cartridges upside down may also cause cross contamination or smearing of printed output. Procedure is not applicable to printer models which feature a maintenance station that ‘cycles’ out of the way during cartridge loading and unloading (i.e. HP Photosmart C5200 printer model series). Repeated ‘head strikes’ with the paper surface can also cause cartridge failure and/or print head leaking.
NOTE 3: Random droplets of ink on your paper are normally caused by contaminates on the printhead nozzle plate area such as a fiber, hair, built up dust, dried ink. The smallest fiber on the printhead can act as a wick and collect ink from the head until it is oversaturated and therefore drip. In many cases both the service station caps/seals (or wipers) and both ink cartridges will need to be thoroughly cleaned to correct this issue.

Advanced HP Printer Diagnostics
To view advanced diagnostics tests for your HP printer, click here:


